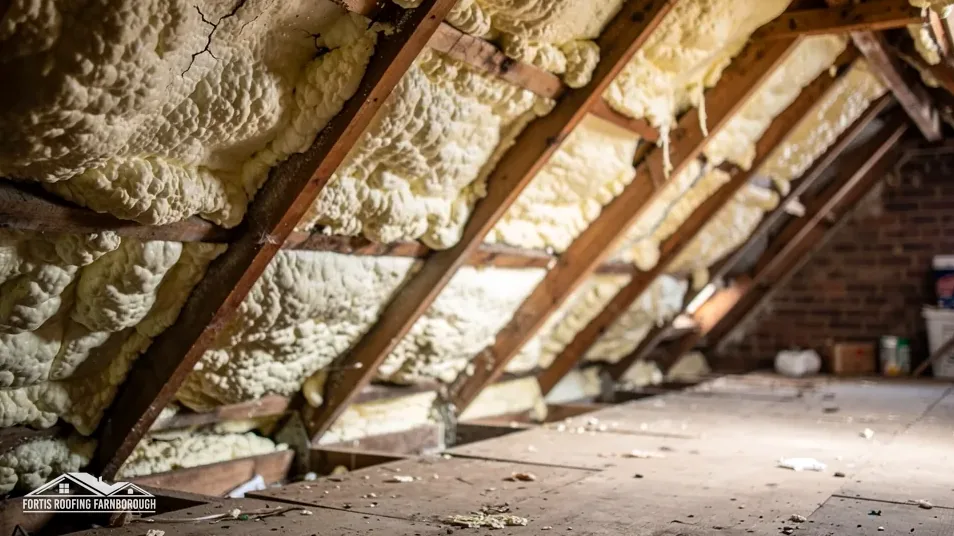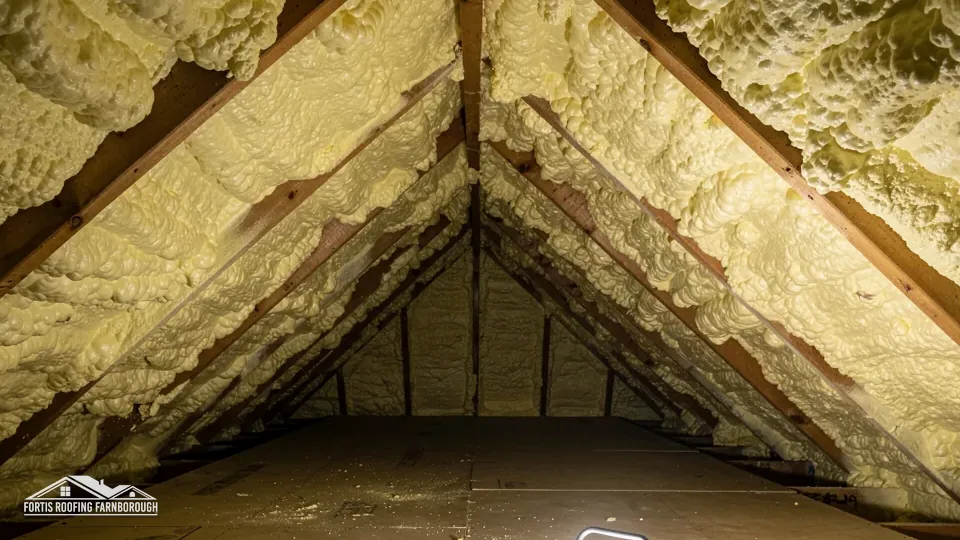

Is removing spray foam hard? Plainly, yes, harder than clearing most other insulation. Mineral wool lifts off a loft floor in rolls. Spray foam is bonded to the surfaces it was sprayed on, set hard in the gaps and often run into corners. Taking it off means cutting, scraping or grinding it away from timber, underlay and tiles without damaging them.
That does not make it impossible, and it is a job that contractors have developed methods for. The detail changes with the foam. A thin, soft coat on an underlay in a roomy loft is a manageable task, while a thick, hard layer encasing rafters in a low, cramped roof space takes much longer and more care.
This guide takes the process in order: the survey and preparation, protecting the house, the removal itself, cleaning the timbers, inspection and repairs, waste, what makes the job difficult and how re-insulation follows, for homes in Farnborough, Aldershot and neighbouring areas.
Survey and preparation
Removal begins before anyone lifts a tool. The preparation decides how smoothly the rest goes.
The survey
A surveyor looks at the extent and thickness of the foam, identifies the type if possible, checks the access and notes the visible state of the roof. A survey of this kind is covered in its own guide. The findings lead to a plan, a method and one written price.
Paperwork
Any papers from the original installation, such as the product data sheet, the installer's invoice and any building control record, help identify the foam and its application. They are worth finding before the survey.
Clearing the loft
Stored items are moved out of the loft, and floor boarding is lifted where it is in the way. The more clearly the work area is set out, the faster and cleaner the job.
Services and safety
Cables, pipes, flues and water tanks in the loft are located. Anything electrical near the work is made safe. Lighting and ventilation for the operatives are planned, since the space is tight and dusty.
Checks for other materials
If anything unexpected is found, such as old lagging or boards of unknown make, work stops while it is identified. HSE's date rule applies here: a property built or refurbished before 2000 is treated as containing asbestos until a test shows otherwise.
Programme
The contractor sets out the working days and what happens on each, so you know when the house will be disturbed and when the loft is usable again.
Agreeing the finish
Before work starts, agree what the timbers should look like at the end: clean enough to inspect, clean enough to take new insulation, or cleaned back to bare wood. Each costs a different amount of time, and a stated finish avoids disagreement later.
Protecting the house
Foam removal creates dust and fragments, and the house needs protecting from them.
Hatch and landing
The route from the loft hatch to the outside is covered with sheeting, and floors and walls along it are protected. Waste has to come down through that route, so the protection must be strong enough to survive the traffic.
The loft itself
Surfaces that will not be worked on, such as ceilings, are covered with sheeting where possible. Dust sheets keep fragments out of the ceiling void below. If the loft is boarded, boards are lifted as needed.
Windows and ventilation
Windows in rooms below are closed, and vents are covered if dust could enter. Doors are kept shut to keep dust to the work area. Operatives use ventilation and, where needed, extraction in the loft.
Personal protection
Operatives wear suitable respiratory protection, eye protection, gloves and overalls. Good practice is to keep the work area under negative pressure or well extracted, though loft layouts vary.
Pets and people
Children and pets stay out of the loft and the rooms below it. The contractor tells you which rooms are affected on each day, and when it is safe to return.
Why it matters
Protection is a small part of the price and a large part of how the job feels. A well-protected house is one where the dust stays where it was made.
Services and the roof edge
Lights and tools in the loft need a safe power supply, and extension leads are routed so that no one trips on them. Water tanks and pipes near the work are covered. If the eaves are involved, the working area is checked so that debris cannot fall into the cavity of the wall below.
Taking the foam off
This is the central stage, and its method depends on the foam.
Soft foam
Open-cell foam generally yields to knives and saws, comes away in sections and is scraped off the wood. The work is repetitive, and a residue is left behind that needs further cleaning. The types are explained in a separate guide on open-cell and closed-cell foam.
Hard foam
Closed-cell foam bonds firmly and sets hard. It may be cut into blocks, chiselled or pared off, and ground or brushed away from the surface. Powered tools can speed it up and risk scarring timber, so the operative has to judge each area. Of the two it is the more laborious.
Working position
Operatives often work lying or kneeling in a space with little headroom, between rafters, under tiles. That limits speed and strength, and it is a reason the work is priced by the hour as much as the area.
Protecting the roof covering
Foam stuck to the back of tiles or underlay can crack the tiles or tear the membrane as it is freed. Cracked tiles are recorded and replaced, and torn underlay is repaired or renewed.
Waste in the loft
Removed foam is bagged as it comes off. Bags are passed to the hatch and down to a waste container, so loose foam does not build up on the joists.
Dust control
Fragments and fine particles are controlled with extraction and regular clearing. A clean working area also lets the timbers be seen for inspection.
Cleaning the timbers and inspecting what is found
Once the bulk of the foam is gone, the surfaces need cleaning, and then comes the part many owners care most about: seeing the timbers.
Cleaning
Residue left on rafters, battens and the underlay is scraped, brushed or ground off back to a sound surface. How clean the finish can be depends on the foam and the timber. A reasonable aim is a surface that can be inspected and insulated again. A perfect finish may not be achievable on old, rough timber.
Inspection
With the surfaces bare, the roofer or surveyor checks rafters, battens, wall plates and the back of the underlay for rot, beetle, splits, staining and rusted fixings. They also examine the back of the tiles and the roof's details from inside. The RICS consumer guide points out that foam hides the timbers, so this is the first real chance to look at them.
Moisture readings
A moisture meter on key timbers gives a number for dampness. Readings are taken at several points and noted with the date and weather. High readings are followed up to find the cause.
Photographs
Each area is photographed, and the images form the record that goes in your file. Our guide to what your surveyor needs after spray foam removal sets out what a good record contains.
Repairs
Rotten timber comes out and is replaced, perished underlay is renewed and damaged tiles are swapped, all before insulation goes back.
Health and the operatives
Because of the dust and awkward positions, the work is paced with breaks, and the contractor uses suitable respirators and extraction. A contractor who cuts corners on this is a warning, since the same attitude may show in the standard of the work.
What makes the job difficult
Several things can make removal harder, slower or more costly than expected. Knowing them helps you ask the right questions at the survey.
Thick or hard foam
The thicker and harder the layer, the longer it takes to cut and clear, and the more waste it makes. Foam that has been sprayed in multiple coats is the slowest.
Strong bond
Foam that has bonded tightly to timber can take wood fibres with it when removed. Old, dry timber is more prone to scarring.
Cramped spaces
Low roof pitches, small hatches, eaves that taper to nothing and hips and valleys all limit movement. The work there is slow and uncomfortable.
Foam in the eaves and gaps
Foam that has run into the eaves, around pipes and into small spaces is hard to reach and has to be dealt with by hand.
Hidden damage
Rot, damp and damage under the foam only show once it is off. They add repair work that no survey can fully predict.
Waste handling
The sheer volume of foam in a large roof makes for many bags and carries. Getting them down a narrow hatch and out of the house takes time.
Cost
These factors feed into the price, which is settled after a survey. Our guide to what decides the cost of spray foam removal sets out the drivers.
After removal: re-insulating and closing up
When the roof has been cleaned, inspected and repaired, it needs insulating again and closing up.
Choosing the build-up
Two main options exist: a cold roof, which keeps insulation along the ceiling under a ventilated loft, or a warm roof, which puts it at rafter level. The choice depends on the roof and how the space is used.
Part L and ventilation
New insulation in a roof counts as renovation of a thermal element under the Building Regulations, which brings Table 4.3 into play, where 0.35 is the renovation threshold and 0.16 the improved target. The eaves ventilation depends on the underlay type. Under BS 5250, Marley's guidance puts eaves openings at 25 mm up to a 15° pitch and 10 mm above for an HR (non-breathable) underlay. Our guide to re-insulating after spray foam removal sets out the design.
Building control
Ask your building control body how the rules apply. For Rushmoor addresses, the Hart and Rushmoor Building Control Partnership is on 01252 398715.
Closing up
The loft is cleaned, the hatch is draught-sealed and boards are replaced. Waste leaves the site. You receive the photographs, the moisture readings and the certificates.
Price
One written total follows the survey, VAT stated. Our spray foam removal service covers the whole sequence.