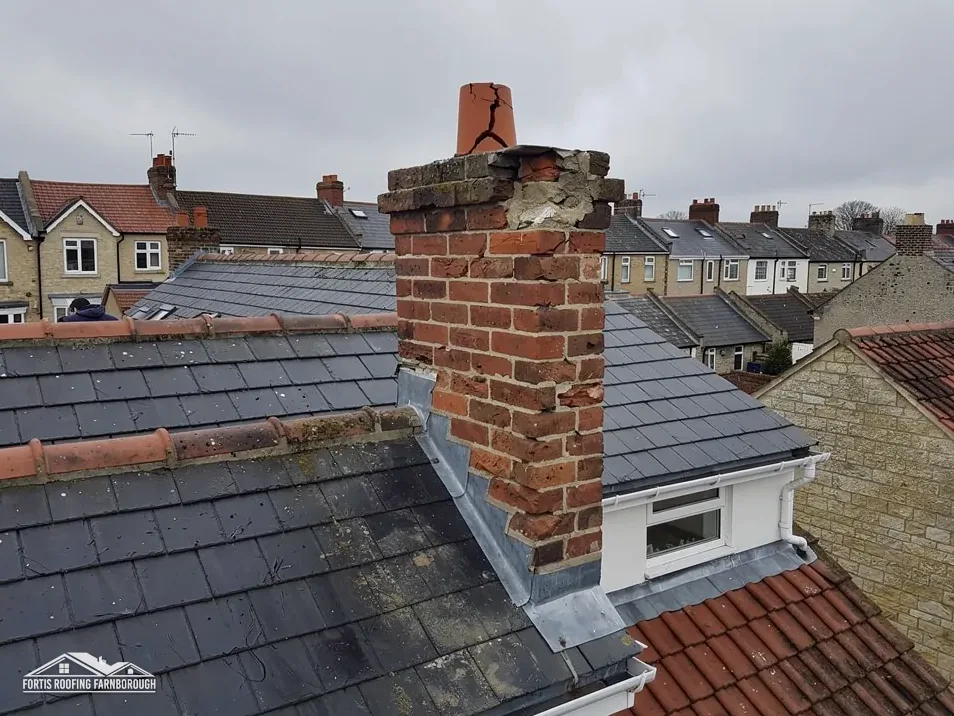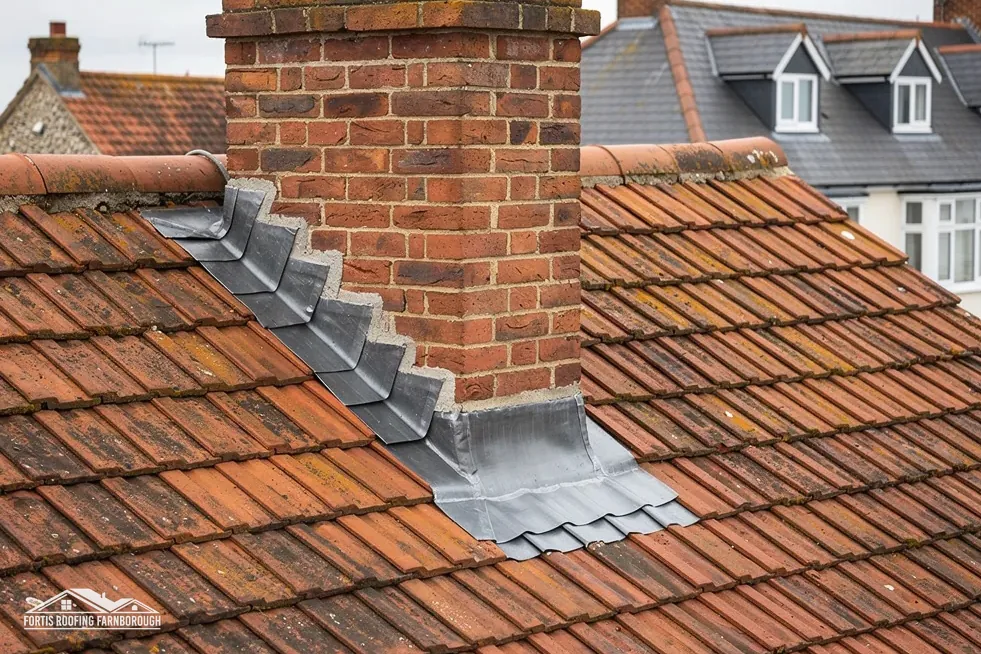
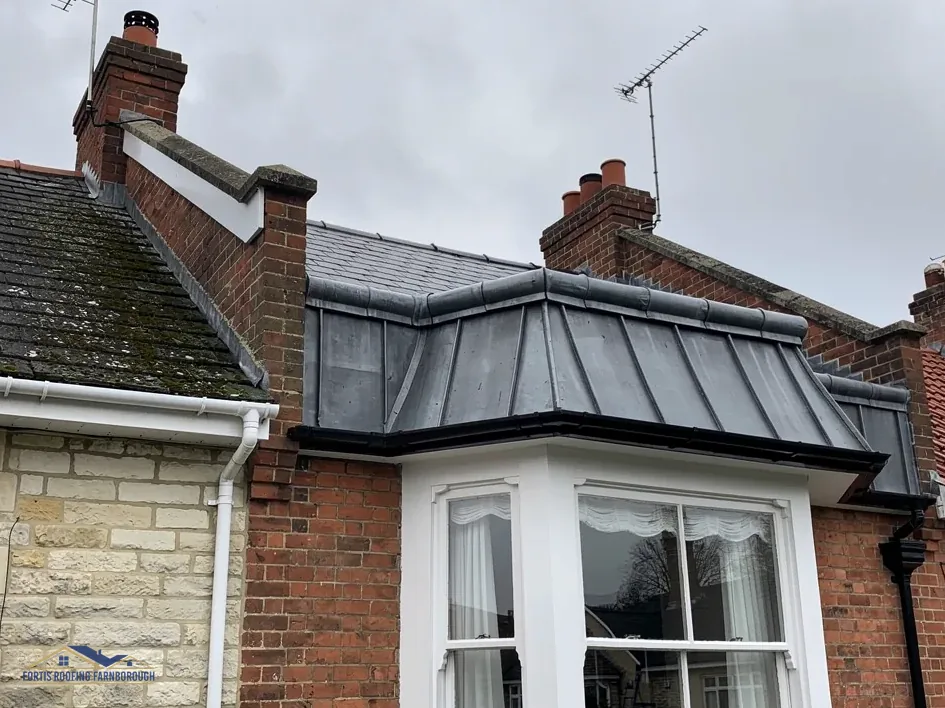
A lead flashing repair puts right a metal seal that has lifted, slipped, split or lost its fixings, without necessarily replacing the whole thing. The usual jobs are re-dressing lead that has been pushed or has sprung away from a wall, re-wedging and re-pointing the top edge where it is set into the brickwork, cutting out and replacing a damaged length, and renewing the small soakers or aprons that have failed. Each can be done in hours on a roof that is otherwise sound.
Flashing leaks are among the most common causes of damp round a chimney, a wall or a dormer, and they are often misread. A stain on a ceiling can look like a failed tile, while the real cause is a lifted edge of lead above it. Sealant smeared over the gap makes the situation look fixed for a season, and then fails. A proper repair deals with the cause, whether that is movement, a failed fixing or a worn section.
This guide describes the common faults, what each repair involves, when a repair is enough and when a length or the whole flashing should be replaced, what the national cost guides publish and what the survey records. It uses plain terms, and each trade word is explained when it first appears.
How a lead flashing is held in place
Understanding how a flashing is fixed explains how it fails, and so what a repair has to do. A typical flashing at a wall or chimney is held in three ways.
At the top: the chase and the wedges
The top edge of the lead is turned into a slot raked into the wall, known as a chase. Lead wedges, small folded strips of lead, are driven in to hold it tight against the back of the groove, and the groove is then pointed with mortar or filled with a suitable sealant. This top joint is where many failures begin, because the pointing cracks, the wedges loosen and the lead drops.
Along the length: the clips
The lower edge, which lies over the roof covering, is held down with lead clips, so that wind cannot lift it. If clips are missing or have corroded, the lead rattles or lifts in a gale.
Across the roof: laps and soakers
Where a flashing meets tiles, each course may have a small piece of lead, a soaker, tucked under the tile and bent up the wall. Step flashings and aprons are laid over these, so that water is shed from one to the next. Our guide to lead soakers and step flashing explains how they work together.
Why movement matters
Lead expands and contracts with temperature. A flashing that is too long without a joint, or fixed too rigidly, can crack along a fold. A repair has to allow for that movement, not fight it.
When a flashing is described as failing, what has usually failed is one of these fixings or one of the folds, and the rest of the lead is often still serviceable.
Re-dressing, re-wedging and re-pointing
The commonest repairs restore the fixings of a flashing whose lead is sound. They are quick, and they are the right repair when the metal itself is in good order.
Re-dressing
Re-dressing means working lead back into its correct shape with hand tools: pressing a lifted edge down, closing a gap against a wall and reshaping a fold that has opened. It suits lead that is thick enough and not cracked. It cannot cure a split.
Re-wedging
Where the top edge has dropped from the chase, the old wedges are replaced. Fresh lead wedges are driven in at regular intervals, so the lead is held tight against the back of the groove. This is the proper way to hold lead in a joint, and it does not rely on adhesive.
Re-pointing the chase
After the lead is wedged, the groove is pointed. A mortar mix suited to the wall, usually weaker than the brick so that it can be raked out again, is common. Some jobs use a flexible lead sealant at the chase, applied only into the joint and never as a patch over a gap. Our guide to why sealant is not a lead repair sets out the difference.
Clips and fixings
Missing or corroded clips are replaced with lead or suitable metal clips. Copper nails and incompatible metals are avoided, because different metals in contact can corrode.
These repairs often take less than a day on a single chimney, and we photograph each stage, so you can see what was done.
Replacing a length or a section
When part of a flashing is cracked, torn, stolen or worn thin, that length can be cut out and a new piece let in. The rest of the flashing stays.
How a new length is let in
The damaged section is cut back to sound lead, at a fold or a lap where possible. A new piece, cut from the same thickness or code, is dressed to the shape and lapped over or under its neighbours, so that water runs from one piece to the next. Where one piece meets the next, a lap is used, and it is made long enough to resist wind-driven rain.
Which code
Royston's brochure lists Code 4, at 1.80 mm, for flashings, and Code 5, at 2.24 mm, for flashings as well. Code 3, at 1.32 mm, is listed for soakers only. A replacement piece should match or exceed the code of the original, and the roofer should be able to say which was used.
Soakers
If one soaker under a tile has failed, the tile above it is lifted, the soaker replaced and the tile refitted. Doing it by sealing from outside does not work.
Valleys
Where a valley lining has split, a section may be repaired or relined. MyJobQuote gives around £540 for a full roof valley replacement (Sep 2026), which shows the scale when a whole valley is renewed, and a smaller repair costs less.
The aim is to leave a flashing that is sound from end to end, with new lead matched to old, and the survey photographs show which lengths were replaced.
When repair is not enough
A repair is the better buy when the lead is sound. When it is not, patching it only prolongs the problem.
Signs that more is needed
- Lead that is thin, worn, creased or cracked along many folds.
- Repeated repairs in the same place, with the leak returning.
- Lead that has been covered in several layers of sealant or bitumen.
- Lead of too light a code for its position, which keeps splitting.
- A chase that is crumbling, so wedges and pointing will not hold.
- Brickwork behind that is soft or open-jointed.
What replacement involves
The old flashing is removed and the chase and wall behind are checked and repaired. New lead, in the right code, is cut, dressed and fixed with wedges, clips and pointing, with soakers and aprons renewed as needed. It is more work than a repair, but it is done once, and lead that is well laid has a long working life. MyJobQuote's leadwork page gives over 80 years for lead flashing, as a lower bound, though the standard of the work decides it.
The cause behind the failure
Before replacing, we look for why it failed. A wall that moves, a chimney that leans, a roof covering that has slipped or a flashing that was too short may all have been the reason. A new flashing on the same fault fails the same way.
Our answer on signs of a leaking flashing lists what to look for before you call.
What the national guides say about cost
Cost guides give figures for lead work, and they show the scale of jobs, not the price of yours.
| Job | Typical figure | Source and date |
|---|---|---|
| Chimney leadwork, full | £350 to £920 | MyJobQuote, Sep 2026 |
| Roof valley replacement | Around £540 | MyJobQuote, Sep 2026 |
What moves the price
MyJobQuote notes that its chimney leadwork range depends on scaffold, because getting up to a chimney is the largest variable. The length of flashing, the number of steps and aprons, the lead code, the state of the chase and the brickwork, and whether the work is a repair or a full replacement all count. A repair of a lifted edge costs far less than a full chimney renewal.
Access
A chimney on a two-storey house nearly always needs scaffold, and a Highways Act 1980 section 169 licence follows if that scaffold crosses a pavement. A flashing on a low extension may be reached by ladder or tower. The quote should state whether access is included.
More detail
Our blog post on how much lead flashing costs covers the cost question at greater length. Both are national guides, not a Fortis Roofing Farnborough price.
Getting a clear quote
A good quote names the repair, the lead code, the length and the access, and it gives one total price. Citizens Advice recommends three written quotes, so set them side by side and confirm each describes the same work.
What the survey records before any lead is touched
A lead repair starts with a careful look, because the cause is not always where the stain is. The survey is where the repair is decided.
On the roof
The survey covers the whole run of flashing: top edge, chase, wedges, clips, laps, soakers, aprons and the roof covering beside it. We check for lifting, cracks, thinning, previous sealant and signs of movement. We measure the lengths and the folds.
The wall and the chimney
The brickwork around a flashing matters. Open joints, soft bricks and a leaning stack all affect whether a repair will hold. We photograph the stack, the pointing and the pots.
From the loft
Where there is access, we look at the underside near the flashing for stains, wet timber and daylight, which show where water has entered. Our guide to how roofers find a roof leak describes how the path is traced.
The outcome
The report carries photographs of each fault and where the water travelled, a plain explanation of the cause and what each repair would do, and one written total. Where a repair will do, you are told so, and where replacement is needed, the photographs show why.
If you want to see the range of leadwork we undertake, our lead roofing page lists it.