A roofer finds a roof leak by working backwards from the damage. The stain on the ceiling is where the water finally showed itself, not where it entered. Rain can run along a rafter, down a pipe, under a membrane or across a ceiling board for a metre or more before it drips. So the work is detective work: note where and when it appears, trace the likely path up the roof, and inspect each joint and junction along it.
The same handful of places keep turning up: wall and chimney flashings, valleys, ridges, verges and broken or slipped tiles. A few so-called leaks are not leaks at all, but condensation forming on cold surfaces in the loft. Telling the two apart saves a lot of wasted repair.
This guide shows how a leak is traced, with a triage table that links what you see inside to the likely cause outside. It explains why water travels, what the weak points look like, how condensation is separated from rain and what we photograph for you. It is general guidance, and a roof still needs a proper look.
Start with the stain and the weather
The first questions cost nothing, and the answers narrow the search a long way before anyone climbs a ladder. When did the mark appear? Did it come during heavy rain, after a long wet spell or only with wind from one side? Is it a ring that grows and dries, a drip, or a patch of peeling paint? Each pattern points somewhere different.
Read the pattern
| What you see inside | Likely cause on the roof |
|---|---|
| Stain by a chimney breast | Flashing, flaunching (the mortar cap on the chimney pot), or the stack itself |
| Stain in a line down a slope | A valley or a run of slipped tiles |
| Stain at the top of a wall | A verge, a gutter or a wall-junction flashing |
| Stain near the ridge line | Ridge tiles, mortar bedding or a damaged ridge vent |
| Damp that appears only in wind-driven rain | A gap on one elevation, often a flashing or a verge |
| Wet marks with no rain | Condensation, a pipe or a tank, rather than the roof |
Use the weather as a clue
A leak that shows in every shower suggests a clear, open path such as a missing tile. One that shows only when rain is driven from the west points to a fault on the west face. A stain that grows days after the rain has stopped may be water released slowly from wet insulation. Write down what you notice, because those notes shorten the search, and ask everyone in the house to add what they have seen.
Why water travels far from where it gets in
A pitched roof is a layered system, and water follows the layers. Understanding that explains why the stain and the fault are often a long way apart.
Underlay carries water downhill
Under the tiles lies the underlay, a sheet laid over the rafters to take any rain that gets past the tiles. If a hole or tear lets water through the underlay, it can run down the rafter, soak into the timber and appear at the ceiling well below the damage. Water also follows the lap lines of the membrane sideways when the fall is low.
Timber and plaster draw water along
Rafters, battens and ceiling joists are timber, and timber soaks water and passes it on. Plasterboard sags where it is wet, and a drip on the plaster may be a wet patch that began on a joist a metre away. A damp mark that shows near an internal wall may be water that crossed the loft floor to reach it.
Gravity and capillary action
Water also moves upwards through tight gaps, by capillary action, which is why a joint that looks like it should shed water can still draw it in. Wind pushes rain under laps, up the slope of a tile and into cracks in flashing, so a fault on the windward side can show only in a gale.
That is why a good survey starts inside the loft, where the underside of the roof tells the story, and not only on the roof surface. Our answer on signs of a roof leak in the loft lists what to look for when you go up with a torch. Keep your weight on the joists or boarding while you do it, and look from the hatch if you are unsure of the footing.
Flashings, chimneys and wall junctions
Where a roof meets a vertical surface, a strip of metal seals the join. Lead is the traditional material, and it is made in numbered codes by thickness: Code 4 is 1.80 mm and commonly used for flashings, Code 5 is 2.24 mm, and Code 3 at 1.32 mm is generally used for soakers, the small folded pieces that sit under each course of tiles at a wall. Lead flashing "can last for over 80 years" according to MyJobQuote's leadwork guide, but it can fail earlier where it was poorly fixed.
What fails at a flashing
- The lead lifts or slips from the wall because its fixing wedges have worked loose.
- The top edge, set into a mortar joint, is no longer sealed.
- The metal has cracked from movement over time.
- A past repair used a smear of sealant, which has cracked or peeled.
Chimneys
A chimney has several weak points at once: the flashing around its base, the mortar cap on the top (the flaunching), the pot, and the brickwork between. A stain on the ceiling beside the chimney breast is a classic sign. Rain also finds the joints of old brick, so the whole stack is checked from outside, and again where it passes through the loft.
Other walls
Where a roof meets a gable wall, an extension wall or a dormer cheek, the same logic applies. Repairs to lead at those joints start with a check of the fixings and the wall joint before any metal is touched.
Valleys, ridges, verges and broken tiles
Beyond flashings, a handful of other places account for the leaks we meet again and again. Each can be inspected from a ladder or the roof, and each leaves a recognisable pattern on the inside.
Valleys
A valley is the sunken line where two slopes meet, and it collects water from both. Lined with lead or with a modern membrane, it has to carry that flow continuously. Debris, moss or a cracked lining can make it overflow, and the water goes under the tile edges beside it. A stain that follows a diagonal sends us to the valleys before anywhere else.
Ridges and hips
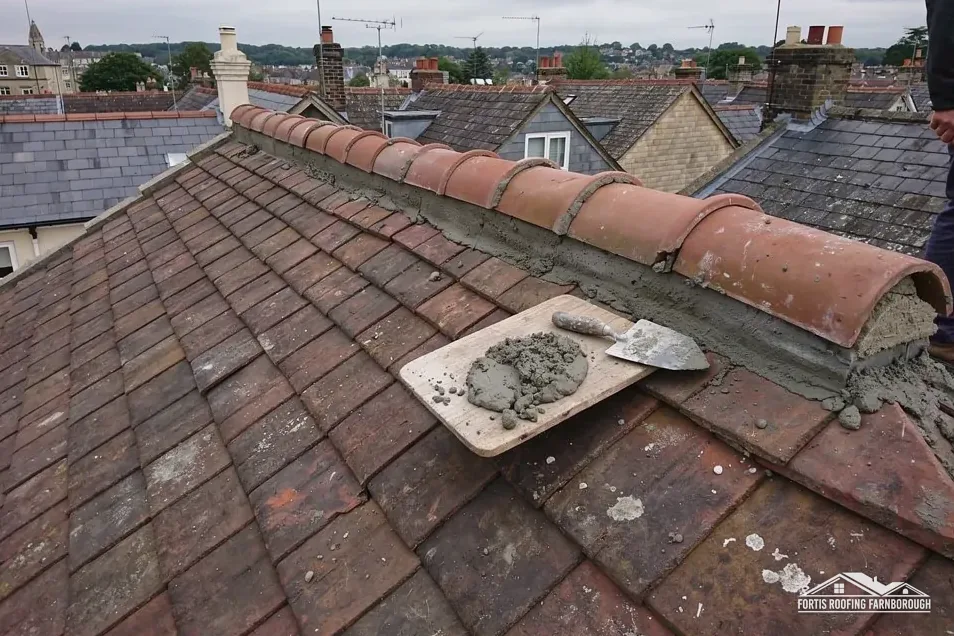
The ridge is the top line of the roof, and hips run down its corners. Traditionally the ridge tiles are bedded in mortar, and the mortar can crack or fall out. Dry-fix systems hold the ridge with clips and screws instead. Either can let water in if a tile has slipped or a joint has opened.
Verges
The verge is the sloping edge at a gable end. Mortar or a dry verge unit holds its tiles, and wind can still lift them. If the verge is broken, rain gets under the edge tiles and into the wall head.
Tiles and slates
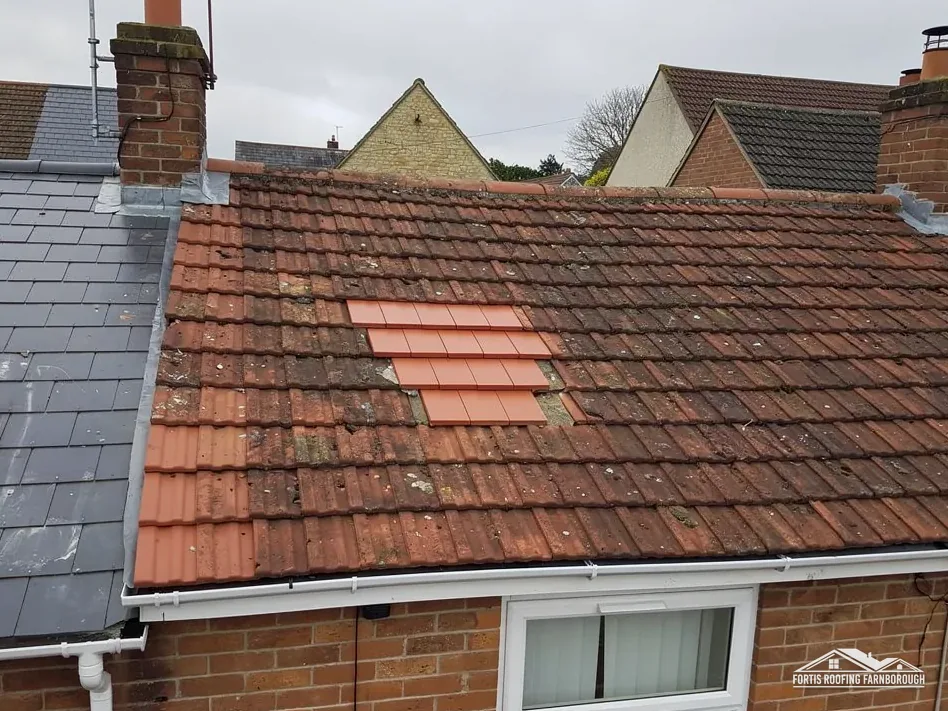
Broken, slipped or missing tiles are the simplest cause, and the easiest to see from the ground. Our guide to storm damage to roofs covers the pattern a storm leaves behind.
None of these needs guesswork. A methodical inspection, with photographs of each joint, will identify which is at fault.
When it is condensation, not a leak
Some stains are not rain at all. In a loft, warm damp air from the house rises, meets the cold underside of the roof and condenses. The water drips from the underlay or runs down the rafters, and it looks exactly like a leak. It tends to show in cold weather, in several places at once, with no relationship to the rainfall.
Clues that point to condensation
- Mould or dark spots across the underside of the roof, not in one patch.
- Wet insulation or damp timber that dries in warm weather.
- Droplets on the nail tips poking through the underlay.
- A stain that appears in cold, still weather with no rain.
What causes it
Moisture from cooking, showers and drying clothes finds its way into the loft. If the loft cannot ventilate, the moisture stays. A cold roof with a non-breathable underlay (HR, meaning high resistance) needs eaves ventilation, which Marley gives as 10 mm along the eaves for pitches above 15° and 25 mm for pitches of 15° or less, within BS 5250:2021. Where loft insulation has been pushed into the eaves and blocks that gap, the problem begins.
What to do about it
The fix is ventilation and controlling moisture at its source, not a patch on the roof. Our answer on whether it is a roof leak or condensation goes through a simple test. A roofer who finds condensation should say so plainly and explain the cure. We photograph the underside of the roof, the insulation and the eaves so the evidence is in front of you.
How we trace a leak on your roof
A leak survey is a sequence, done in the same order each time so that nothing is skipped.
Inside first
The loft comes first where it can be reached, with a look at the roof's underside along the line above the stain. Wet timber, stained insulation, daylight and tracks of water on the underlay show the path. We check for condensation signs at the same time, because ruling that out matters.
Then outside
From the ground, a ladder or the roof itself, we follow the line uphill from the stain, noting every joint the water would have crossed. We look at tile condition, joints, flashings, valleys, ridge, verges and gutters. We photograph each location, and we note what is sound as well as what is not, so that you can see that the survey was a full one and not a quick glance at the first fault.
Testing, where it is needed
If the cause is still unclear, a controlled water test can help. A hose is run over one area at a time, starting low and moving up, while someone watches the inside. This is slow and it needs two people, but it isolates the path that no one can see.
What you get
You receive photographs of the fault and of the path of the water, a plain explanation, and one written total price for the repair after the survey. If more than one fault is found, the explanation says which matters most. If a leak cannot wait, move valuables, put a tray under the drip, switch off any circuit near wet fittings and stay off the roof. Phone us on 01252 596302 or send photos on WhatsApp, and tell us when the leak appears. If you plan to claim, tell your insurer first and keep dated photographs. For the wider picture, see our roof repairs page.