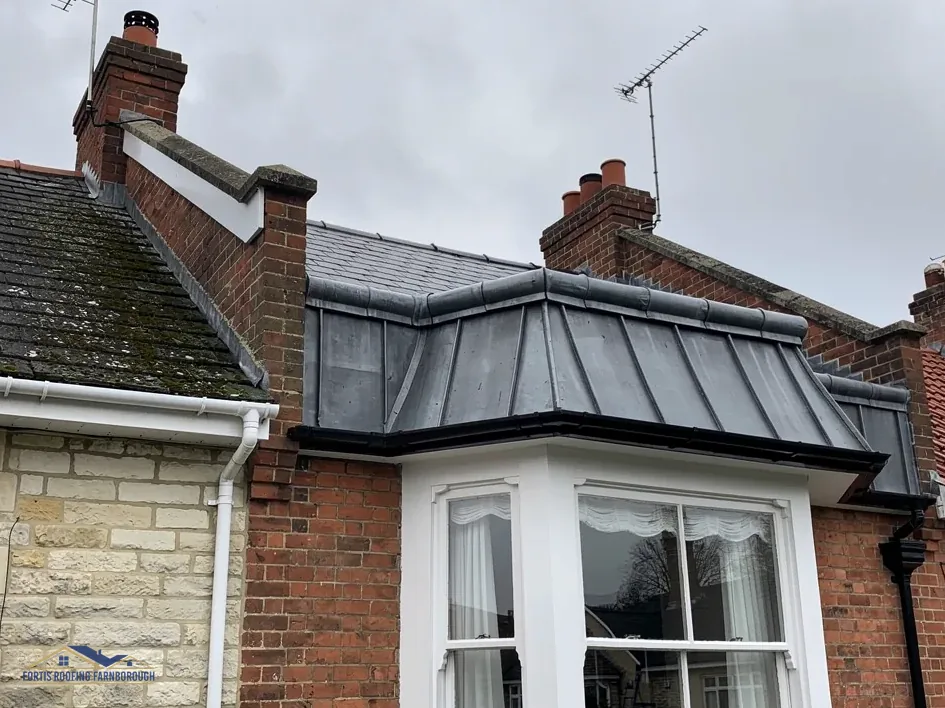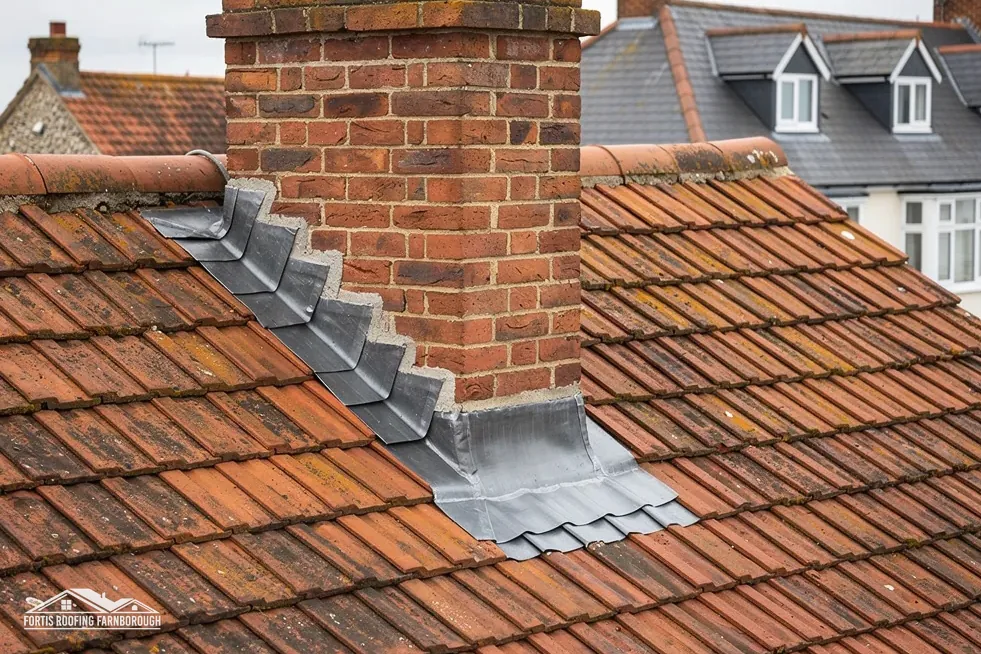
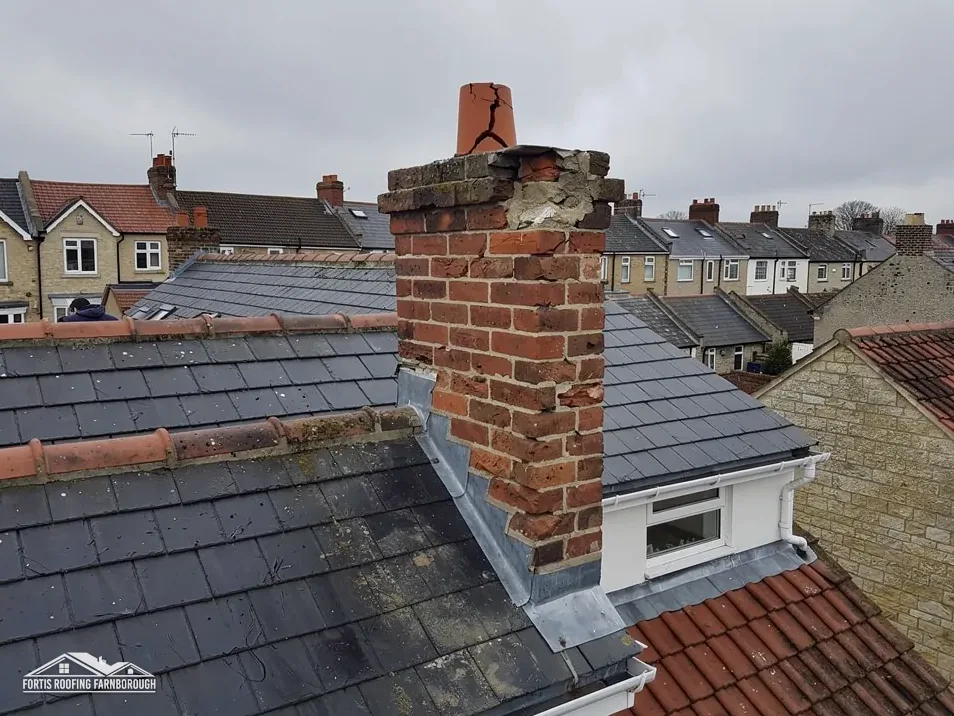
Soakers and step flashings are the lead pieces that seal a sloping tiled roof against a wall that rises above it, such as the side wall of an extension, a gable abutment or a party wall. Soakers are the little folded pieces tucked under the tiles. Step flashings are the stepped strips set into the wall and laid over them. Together they form a series of overlapping layers that let rain run down the slope without getting behind the wall or under the tiles.
The arrangement is old and it works well, because it allows for movement and uses gravity at every overlap. It also contains a lot of small parts, and a fault in any one of them can let water in at a spot that is hard to see. A single slipped soaker or lifted step can wet a wall plate or a ceiling edge for years before the stain shows.
This guide sets out what each part is, how they sit together, what lead code each normally uses according to the Royston Lead brochure, where they go on a tiled roof, how they fail and how to tell, and what a repair involves. Each trade word is explained where it first appears.
What soakers and step flashings are
The two are often confused, and the difference matters when a roofer says one of them needs replacing.
Soakers
Each soaker is a small oblong of sheet lead folded into an L. One leg lies flat under a tile or slate, and the other turns up the face of the wall. There is one soaker for each course of tiles along the wall. Each is slid under the tile above it and over the tile below, so that water running to the wall edge is carried down onto the next tile. Soakers are the hidden layer, and when they are properly laid, they are invisible from outside.
Step flashings
A step flashing is a stepped piece, or a series of separate steps, that covers the top of the soakers and the junction with the wall. Its upper edge tucks into a slot raked in the brickwork, and its lower edge follows the slope of the roof, stepping down with the brick courses. It overlaps the turned-up part of the soakers, so water runs over the flashing and the soakers carry it onto the tiles.
Why both
The step flashing seals the wall joint, and the soakers seal the tile edge. A step flashing without soakers lets water in at the tile line, and soakers without a flashing leave the wall joint open. Our guide to lead flashing repair shows how the top edge is held by wedges.
In some roofs, notably with large interlocking tiles, a continuous apron flashing or a different detail takes the place of soakers, so the exact arrangement depends on the covering.
Code 3 for soakers, Code 4 for step flashings
Lead is supplied in codes by thickness and weight, and the codes that suit soakers and flashings are published in the Royston Lead cast-lead brochure.
| Part | Usual code | Thickness | Weight |
|---|---|---|---|
| Soakers | Code 3 (green) | 1.32 mm | 14.97 kg/m² |
| Step flashings | Code 4 (blue) | 1.80 mm | 20.41 kg/m² |
What the brochure says
Royston lists Code 3 for soakers only. That is where the thinnest lead is intended, because a soaker is protected under the tile and has little exposure. Code 4 is listed more widely, for soakers, flashings, pitched valleys and dormers, so a thicker lead for the exposed step flashing fits the brochure, and Code 5 is also listed for flashings.
Why thickness is matched to the job
A soaker is hidden and lightly loaded, so a thin sheet is enough and easy to fold under the tile. A step flashing is exposed to weather and movement and has its top edge held in the wall, so it needs more thickness to resist cracking. Using a thin code for an exposed flashing is one cause of early splitting.
Which code for your roof
The right code depends on the exposure, the length of each piece and the tile. We check the existing lead and say which we propose. Our answer on how lead flashing is fixed goes through the fixings.
These codes are the brochure's, and the specification for a particular job is a roofer's decision, made against the standard that applies to lead roofing.
Where they go on a tiled roof
Soakers and step flashings appear wherever a sloping tiled roof butts up against a wall that rises above it. There are a few common places.
Gable abutments and extension side walls
Where a lean-to or a single-storey extension roof runs up against the wall of the main house, the roof slopes down away from the wall and the side edge meets a wall that steps up beside it. The stepped flashing follows the roof slope along the wall.
Party walls and terraces
On terraced and semi-detached houses, the roof may meet a raised party wall or a parapet. The slope of the roof meets the wall at its side, and stepped and soaker details run along that length.
Chimneys
Beside a chimney stack, stepped flashings run up the slope on each side, with an apron below and a back gutter above, and the apron is a separate piece.
Dormers
Dormer cheeks, the side walls of a dormer window, meet the main roof at an angle, and stepped lead and soakers deal with that line.
Why position matters
A step or soaker at the bottom of a run carries the water of the whole slope above it. A fault there is often the one that leaks. On a survey we look at each of those places, mark where the lead meets the wall, and photograph it.
If you can see the wall edge of your roof from a window or the garden, you can often see the steps, and notice whether any have lifted.
How soakers and steps fail
The parts are simple, and so are the ways they fail. Each failure has its own clue, and each is cured differently.
Failures of step flashings
- Lifted or dropped edge: the top edge has come out of the groove because the wedges or pointing have failed.
- Cracks along the folds: from movement, thin lead or repeated bending.
- Gaps between steps: where one piece no longer overlaps the next.
- Sealant over the joint: a sign of earlier trouble, and of the faults it hides.
Failures of soakers
- A soaker slipped down: the lead has dropped from its place under the tile, leaving a gap at the wall edge.
- Corroded or perished soakers: especially where thin lead has been attacked by acid from mortar or from a lichen-covered tile.
- Missing soakers: some roofs were fitted with fewer than the courses needed, or with the wrong shape, and leak at once.
Signs you can see
From inside, a stain on the wall or ceiling edge, beside the wall that the roof meets, is a classic sign. From outside, a gap or lifted lead at the wall edge, staining on the brickwork and moss along the line are clues. Our answer on signs of a leaking flashing lists more.
Soaker faults are hard to confirm from outside, because the soakers are under the tiles. That is why a survey may involve lifting a tile or two to look, with the tiles set back afterwards.
Repairing and replacing soakers and steps
What the repair involves depends on which parts have failed and on how much of the run is sound.
A lifted step flashing
If the lead is sound but has come out of the groove, it is re-dressed, re-wedged and the groove is pointed again. This is quick and keeps the existing lead.
A cracked or worn step
A damaged step can be cut out and replaced with new lead of the same code, lapped over the next piece. If many steps are cracked, the whole run is renewed.
A slipped or failed soaker
For a single soaker, the tile over it is lifted, the old piece drawn out, a new one slid in and the tile put back. Where the soakers have all failed, the courses along the wall are lifted and relaid with new ones. It is more work than a flashing repair, but it deals with the cause.
Where the wall is the problem
If the brickwork behind is crumbling, the groove will not hold a wedge. The wall is repaired first, or the flashing is fitted in a new chase.
What it costs
MyJobQuote gives chimney leadwork, which includes stepped flashings, at £350 to £920, depending on scaffold (Sep 2026). That is a national guide's figure, and the survey that follows gives you one written total.
What the survey records
We photograph the run of steps and the wall edge, test the wedges and pointing, and look inside for the path of any water. Where soakers are suspect, we lift a tile or two to check. For the wider range of work, start at our lead roofing page.
Lifespan, listed buildings and keeping the lead sound
Properly laid soakers and steps last a very long time, and a few habits help them reach it.
How long they last
MyJobQuote gives lead flashing over 80 years, as a lower bound. HomeBuilding gives lead on a flat roof 60-100 years. Those are typical published ranges, never promises, and they assume the right code, secure fixings and a sound wall. A soaker is protected under the tile, which can help it last, but it is out of sight, so faults go unnoticed.
Listed and period buildings
On a listed building, replacing lead with another material may need listed building consent, and like-for-like repair is the safer route. In a conservation area, check whether an Article 4 direction applies. On older terraces, lead soakers and steps are often original, and keeping sound ones respects the building.
Looking after them
- Look at the wall edge of the roof from the ground each year, and after storms.
- Keep moss and leaves clear of the junction.
- Do not seal over a leak yourself; call a roofer.
- Note any new stain on the wall or ceiling next to the roof.
Approval and standards
Lead sheet work follows BS 6915, cited in Approved Document C, and not BS 6229, which is for membranes. A repair to a few soakers or steps needs no building control application. Renewing a whole roof is a separate question that the Planning Portal's test answers.
If you suspect a fault at a wall junction, a survey will find it. Our answer on how lead flashing is fixed shows what a sound fixing looks like.